
Online Banking Guide

young woman at coffee shop with phone smiling
Online Banking Guide

With Online Banking you can checks balances, pay bills, deposit checks, transfer funds internally and externally, review history, make loan payments, manage all of your accounts and so much more from any device with Internet access. For your tablet or smartphone, simply download our mobile app to your Android or Apple device. It's banking at your fingertips with all of the convenience, security and services you expect and more from SCU Credit Union.

Getting Started

Getting Started

In order to use our Mobile Banking app, your device needs to be up to date with operating system updates from the manufacturer. To see which operating system is required for your device, view our app in the Apple App Store or the Google Play Store. In the Apple App Store, view Compatibility in the Information section. In the Google Play Store, view "Requires Android" in the Additional Information section.

In order to use the SCU Mobile Banking app, you must be enrolled in Online Banking. If you are not yet enrolled, you can sign up from any page on our website by clicking the word Register in the bar at the top of the page. On the next page, click Register (located under the Log In button) and follow the prompts.

  1. Download the SCU Credit Union mobile banking app on your smartphone or tablet. 
    • For Apple devices, go to the Apple App Store here. To see device requirements, review "Compatibilty" in the Information section.
    • For Android devices, go to the Google Play Store here. To see device requirements, review "Requires Andriod"  in the Additional Information section.
  2. Open the app and enter your Online Banking Username and Password. If you are the only person with access to the device and you want your username to be saved, check the box next to Remember me. Tap Log In.
  3. You will be prompted to complete required two-factor authentication by having a code sent to a phone number or email address that is already on file for you in Online Banking. Select SMS (text), Email, or Call. If you have multiple phone numbers or emails on file, select which one you want the code sent to. Then tap Send code.
    • Tap the box next to Remember this device if you don't want to use two-factor authentication on this device in the future. You will have to enter a name for the device such as "My Cell Phone".
  4. Enter the six digit code and tap Verify. The code will only be valid for 15 minutes after it is sent. If you don't receive a code or the code has expired, tap Resend code. 
  5. You will be brought to the main screen of the app and will see your accounts and account balances. 

  1. If you forget your password and need to reset it, open the mobile app.
  2. On the log in screen, input your username and tap "Forgot Password?"
  3. Read the Forgot Password Disclosure and tap Agree.
  4. Enter your username, date of birth, email address you use for online banking and your zip code. Tap Continue.
  5. Select to receive a temporary password via SMS (text) or email.
  6.  Log in to mobile banking with your username and the temporary password. 
  7. Create a new password and use that new password going forward.

Two-Factor Authentication is a security feature for Online Banking that requires users to enter their username and password as well as a one-time use security code. This code will be sent via email, SMS (text) message or a phone call to an email address or phone number that is already on file. This security feature will be triggered every time you log in unless you select "Remember This Device"  when logging in. Starting with the next time you log in on that specific device, you will not be required to complete two-factor authentication. 

To enable two-factor authentication even on devices you've prompted the system to remember, you can turn Require Two-Factor Authentication For Each Login on in the Security tab of your Settings within Online Banking. Please note that you cannot adjust this setting within our mobile app.

If your device supports Touch ID or Face Recognition (Face ID), you can enable it for Mobile Banking. 

  1. To enable Touch ID or Face ID, open the mobile banking app and tap More, then Others, and finally Settings. 
  2. Tap Touch ID or Face ID to open the settings for that feature. 
  3. Tap the toggle next to Use Touch ID (or Use Face ID) to turn it on. 
  4. To disable either feature, revisit the settings for that feature and turn the toggle for the feature off. 


Remote Deposit Capture

Remote Deposit Capture

Remote Deposit Capture allows you to deposit most checks through mobile banking. Checks not drawn on U.S. banks and/or not U.S. funds cannot be deposited through Remote Deposit Capture. 

  1. Open the mobile banking app. 
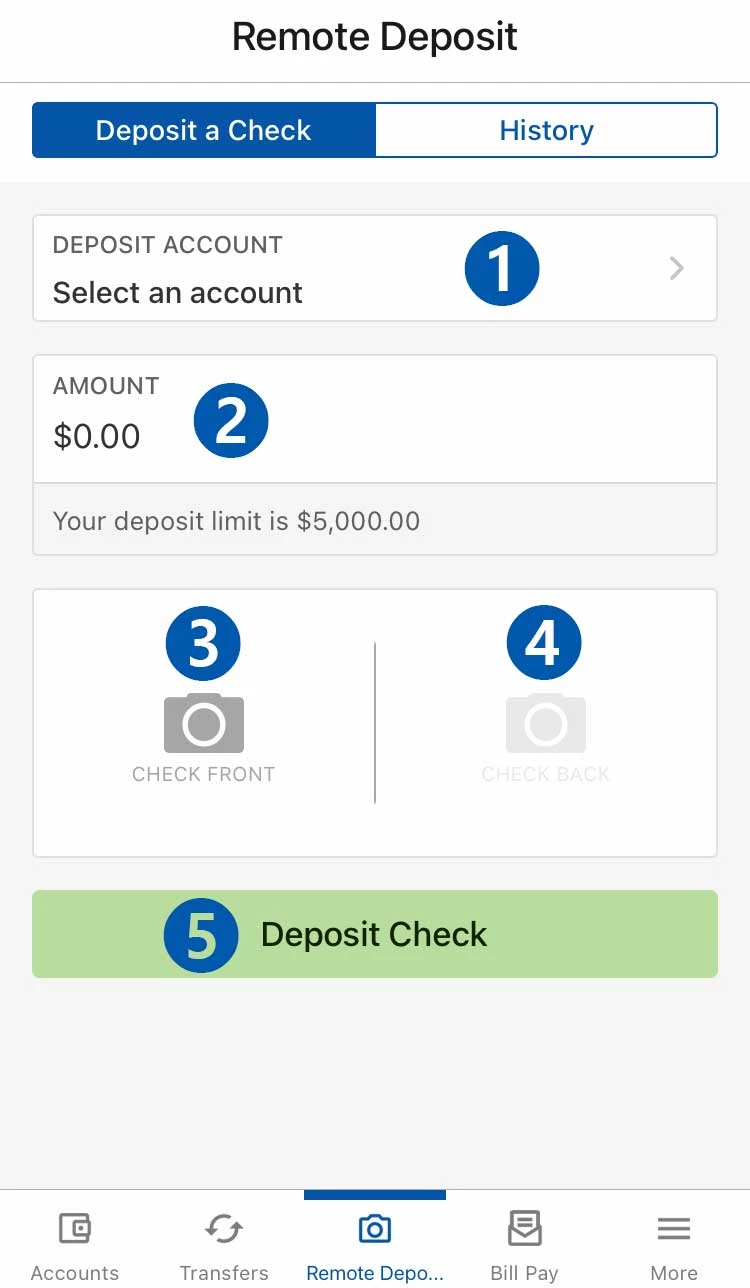
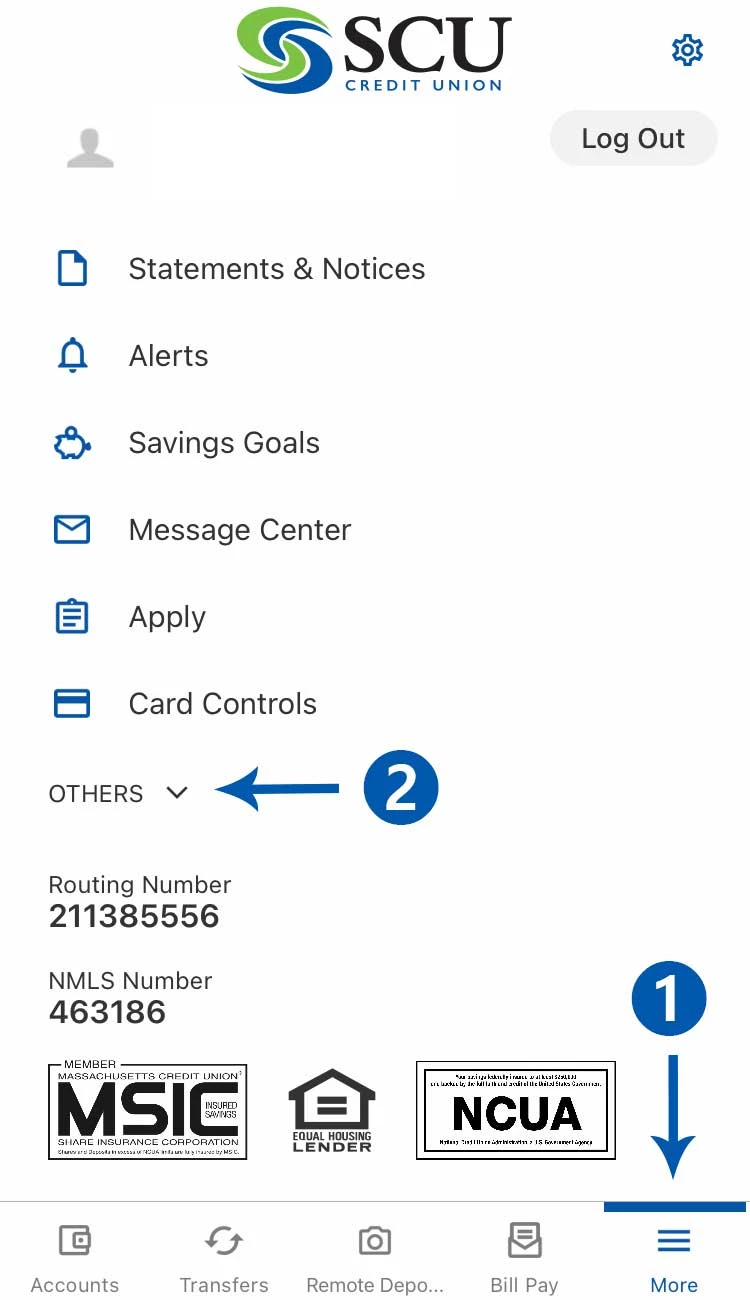
  2. Click Remote Deposit at the bottom of the screen.
  3. Select which account you want to deposit the check into.
  4. Type in the exact amount of the check.
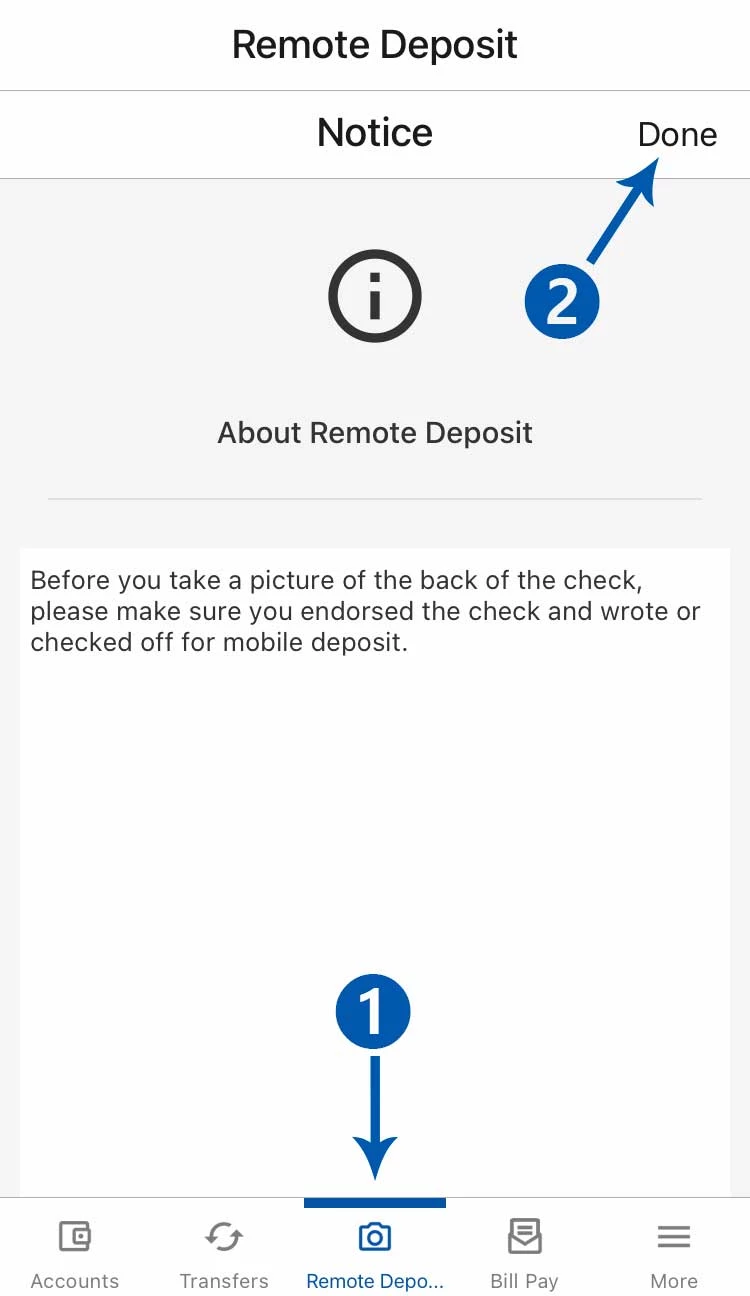
  5. Endorse the check and write "For Mobile Deposit at SCU" below your signature (or, if available, check off For Mobile Deposit).
  6. Click Check Front. If you see "Prepare the front of the check", select continue in the bottom right of the screen. Align the check within the box and tap the screen to take the picture. If the picture is clear, click Done. If you need to retake the picture click the trash can icon. 
  7. Click Check Back and repeat the same process to take a picture of the back of the check. 
  8. Click Deposit Check. 
  9. After depositing a check remotely we recommend retaining the check for a minimum of three (3) business days after the deposit is credited to your account and it appears in your transaction register in Online and Mobile Banking. Then, destroy the original check by shredding.

You will receive an email indicating your deposit has been accepted, held for review or rejected. To avoid duplicates, please do not resubmit a deposit unless you receive an email indicating further action is necessary.

In most cases, funds from approved deposits are available immediately. If your deposit is held for review and you submitted it before 2 p.m. EST on a business day, the check will be processed that same day. All deposits are subject to the SCU Credit Union Funds Availability Policy. Deposits are subject to verification.

After depositing a check remotely we recommend retaining the check for a minimum of three (3) business days after the deposit is credited to your account and it appears in your transaction register in Online and Mobile Banking. Then, destroy the original check by shredding.

In most cases, funds from approved deposits are available immediately. If your deposit is held for review and you submitted it before 2 p.m. EST on a business day, the check will be processed that same day. All deposits are subject to the SCU Credit Union Funds Availability Policy. Deposits are subject to verification.

You will receive an email indicating your deposit has been accepted, held for review or rejected. To avoid duplicates, please do not resubmit a deposit unless you receive an email indicating further action is necessary.

The daily deposit limit for Remote Deposit Capture is $5,000.

Bill Pay

Bill Pay

  1. After logging in to Online Banking, click on the Bill Pay tab. 
  2. Read and agree to the Bill Pay Agreement.
  3. Click Continue.


  1. Click Add Payee. 
  2. Select Business and click Next.
  3. Enter the Payee's information and click Next. Enter additional information about the business and click Add Payee. 
    • For Account Number, please enter the number of your account at that business.
    • For Nickname, enter the name you would like to appear for that business in Online Banking. 


  1. Click Add Payee. 
  2. Select Person and click Next.
  3. Enter the Payee's information and click Next. Enter the address and phone number for the person and click Add Payee. 
    • For Nickname, enter the name you would like to appear for that person in Online Banking.  

  1. In the Bill Pay Dashboard, click on the name of the person or business you want to pay.  
  2. Enter the required information and click Submit Payment.
    • For Frequency, select One Time to make one payment or pick how often you want
    • this payment to reoccur. 
    • For reoccuring payments, a new section will appear for you to enter details about the reoccurances. Select an Ending option. If you select Never, the payment will repeat at the selected frequency until you stop it. If you select On (date), enter the date you want the payments to end. And if you select After (number) occurances, enter how many times you want the bill to be paid at the selected frequency. 
    • Click Add Memo to enter a memo for the payment. 

  1. Select the MultiPay tab from the Bill Pay Dashboard.  
  2. Click on each Payee you want to pay.
  3. For each Payee, enter the amount you want to pay and select the account you want to pay from as well as the date to send the payment.
  4. Review the total payees and total amount. 
  5. Click Submit.
  6. Review the confirmation screen and click Confirm Payment. 

  1. Click the Scheduled tab. 
  2. A dot will appear on the calendar for each payment day.
  3. Individual payments will be listed below with the ability to edit by clicking on the pencil icon.
  4. To filter the scheduled payments, click the word Filter. Make your selections and click Apply Filter to see the results.


To cancel a payment, locate the payment you want to cancel in the “Scheduled payments” section on the right hand side of the main payments page and click its corresponding “Delete” or “Cancel” icon.

You will be prompted to confirm your request to cancel the payment.

Click the “Yes, Cancel Payment” button.

Note: If the payment you are canceling is part of a recurring payment rule, you will be asked if you would like to cancel just the single payment, or the entire recurring payment rule.

If you need to see proof of payment or place a stop payment, please call our Contact Center at 781-784-7725 or 877-661-3300.

  1. Click the History tab. 
  2. Click on a listed payment to see more information about it. 
  3. To filter your payment history, click the word Filter. Make your selections and click Apply Filter to see the results. 
  4. To export or print your payment history, select the appropriate icon below the word Filter.
    • To export your payment history, click the arrow icon, select the Payee, Status, From Account and dates you want included on the report. Click Export to generate and automatically download a .csv file.
    • To print your payment history, click the printer icon. A new page will open with a printer-friendly version of your payment history.